OUR WINTER SALE ENDS SOON!
*Boxing Day deals coming soon. Free delivery on orders over £499
How to Install a Smart Thermostat
How to Install a Smart Thermostat

Taking the leap into smart home technology can be daunting, but once you’re set up and adjusted, you’ll wonder how you ever lived without it. Smart heating is one of the newest advancements in smart home technology and lots of homeowners are making the transition into smart thermostats.
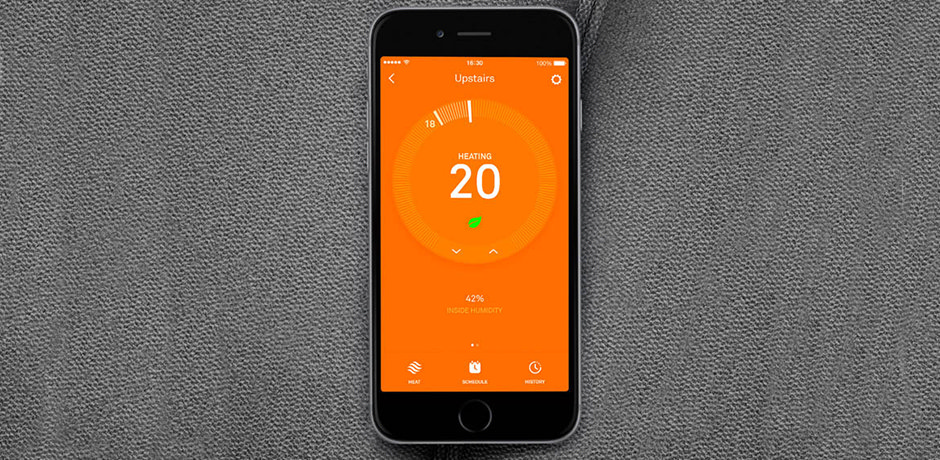
Smart thermostats provide users with greater control over their heating than a typical thermostat through the use of automation systems. Smart thermostats allow you to control your heating (and cooling) systems remotely by using an app on your smartphone, tablet, or computer.
So if you too are making the transition and are a competent person or qualified electrician, we’ve created an easy step-by-step guide on the smart thermostat installation process.
How to Install a Smart Thermostat
Equipment Needed:
- Smart thermostat and instruction manual
- Screwdriver
- Screws
- Wall Plugs
- Pencil (optional)
- Wall Filler (optional)
If you’re installing the Nest Learning Thermostat, this will come with a complete guide and installation tool-kit. The following instructions are a general guide for how to install most thermostats, however, each brand may differ. If you’re installing the Nest thermostat E, the following instructions will apply to the installation of the Nest’s Heat Link which then connects wirelessly to the thermostat display.
Step One: Check compatibility
Before you begin the smart thermostat installation process it’s important that you double check the voltage is compatible with your current system. Many thermostats have a voltage range they are compatible with and this should be mentioned in the instruction manual.
Step Two: Turn the power off
Because you will be working with electricity it’s important to make sure the power is off. This will either be done by flicking the relevant switch in your fuse box, or you may have a general power switch located near the wiring centre for your heating system. These will likely be located in a cupboard under the stairs or wherever your boiler is stored.
Step Three: Remove your old thermostat
If you’re replacing an old thermostat for a smart thermostat it’s fairly simple to remove the previous unit. First remove the front cover. Some just pop off if you give them a slight pull, and others need to be unscrewed and removed.
Next you’ll want to take your screwdriver and begin unscrewing the wires currently placed in the screw terminal. Once each wire has been disconnected, you can go ahead and remove the black plate of the thermostat. This too may require you to unscrew it from its place in the wall before carefully slipping it off, being careful not to tug at the wires as you go.
Step Four: Placing the base
If you’re happy to place your new smart thermostat in the exact same place as your previous unit and they’re roughly the same shape and size this should be a super easy step!
Take the backplate of your new thermostat and pop the wires through the central hole so that you can push the base flush against the wall.
This next step is dependent on whether you have to drill new holes or not. If the designated screw holes on the back plate line up with the holes that previously held the screws for your old unit, go ahead and put your screws straight in!
More likely than not your screw holes won’t line up, in which case you might want to fill in the old holes and using a pencil, mark out where you’ll have to drill new holes.
Once drilled, pop some wall plugs in the new holes and screw your smart thermostat’s base into the wall.
Step Five: Connect the wires
Before connecting the wires be sure to check that there’s no corrosion from the previous thermostat unit. If all looks clear, then take each wire individually and place them in the corresponding screw terminal.
For a refresher on the wires you might expect to find in your thermostat:
- Red wire for power (connect to the R terminal)
- White wire for heating (connect to the W or W1 terminal)
- Green wire for fans (connect to the G terminal)
- Yellow wire for cooling (connect to the Y terminal)
- You may also have a common wire which is likely to be blue (connect to C terminal)
Take a moment here to tuck any excess wire length back into the wall once your wires are connected to the screw terminal. This will ensure your smart thermostat display unit will sit nicely against the back plate.
Step Six: Finishing touches
With all of the electrics secured it’s now time to place the front of your smart thermostat onto its base. Take the screen interface and place it into the base on the wall. Depending on which brand of smart thermostat you have, some might click into place and others may require you to screw the front unit into place.
Now all that’s left to do is turn the power back on!
With everything working correctly your smart thermostat screen should guide you through the necessary steps to get your devices connected and running.
Hopefully this guide has given you the rundown of how to install a smart thermostat. If you’re interested in smart heating and would like to know more, feel free to check out our Guide to Smart Heating.

Trinity
Trinity is one of our expert bloggers in bathroom design and DIYs. Read her blog posts for the latest coverage of style trends and easy-to-follow guides.


