OUR WINTER SALE ENDS SOON!
*Boxing Day deals coming soon. Free delivery on orders over £499
How to Paint an Acrylic Bath
How to Paint an Acrylic Bath
Learn how to paint your acrylic bath or bath panel. Adding a new fresh and colourful look to your bathtub!

Equipment needed
Step 1
Step 2
Step 3
Step 4
Step 5
Step 6
Step 7
Step 8
Additional tips
Jump to a section of this post by clicking a link above.
How to paint an acrylic bath step-by-step
When it comes to making a bathroom feel like home you need to give it a unique look that fits into your style and that you can call your own. This can be done in a number of ways - from boutique shop accessories to floral patterned wall tiles, you can be as imaginative and quirky as you want, but remember you will see it every single day and certain themes and styles may become stale after a while.
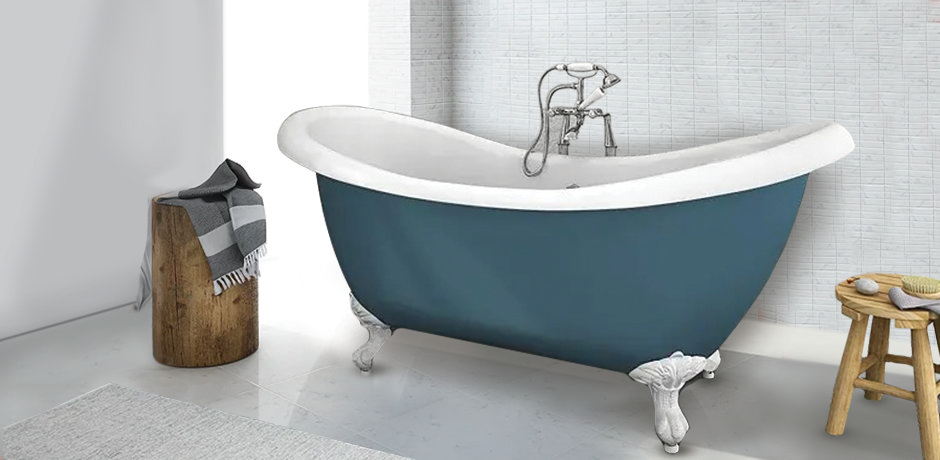
One easy way to get an original, chic bathroom is to give your acrylic bath a lick of paint on the outside in a colour of your choosing.
By following these easy steps you can give your bathroom a new lease of life without having to strip out any old fixtures or fittings.
Equipment needed
● Acrylic Polymer Paint
● Primer
● Quality brush / roller
● Rough and super-fine sandpaper
● Face mask
● Pair of gloves
● Masking tape
● Old newspapers / something to protect the bath and your floor
Step 1.
We begin with preparation. Make sure that you have all of the equipment you need for the job and get the area you are working in ready. Lay down newspapers anywhere paint may drip or splash. Tape up any areas that require finer work being done, i.e. claw feet, the roll top of the tub, etc.
Step 2.
Before starting any work on a bathtub you must ensure that it is clean and dry from top to bottom. This means that less sanding will be needed.
Step 3.
You will need to key the bath to begin with. This entails using a medium grit sandpaper to give the surface of the outer tub a rough feel to the touch, making it porous for the paint to set well. This rough surface gives the primer something to adhere to.
Step 4.
Rinse away any excess dirt from the sanding step with warm water and (if you have it) sugar soap. Leave to dry, ensuring no residue from sanding or washing remains.
Step 5.
Apply a thin layer of primer with either a brush, roller or spray gun. Making sure it is completely even. If you allow the primer to drip, it will appear on the tub after applying the paint. Two or three really thin layers are best, with a light sanding between layers will help get that perfect finish.
Step 6.
When the primer is dry you can begin to paint the tub with acrylic polymer paint. A spray gun would be ideal but again either a quality paint brush or roller will do the job.
Step 7.
Make sure that the first thin layer of paint is dry and then use super-fine sandpaper to make sure that the finish is smooth and without brush marks or streaks. Apply around 3 layers of paint, using super-fine sandpaper after each application but not, however, after the final coat.
Step 8.
Leave the final layer of paint for about 48 hours before using the bathtub. You may want to seal the paint with an aerosol or rub-in sealer but check with the manufacturer first because many sealants may not be suitable for use on acrylic.
There you have it, a bathtub you really can call your own. If you ve painted your tub, why not send in some pictures via our Twitter page? We would love to see them!
Additional tips
Research your paint type. We recommend speaking to the manufacturers of different paint brands to get their recommendations on using paint on acrylic. Remember that paying a little extra for paint here may save you trouble later on in the process.
Acrylic is not generally meant for painting, as colour is normally baked in during the forming process. Although this painting process will give you a great even finish that you’ll be happy with, we don’t expect it’ll be 100% perfect or flawless.
Be bold! Whilst magnolia may look good on your new bath, we think that a pop of colour such as lemon or mint can give your bathroom that look you’ll love for years to come.
Thank you for reading and don't forget we sell a stunning range of brand new freestanding baths.

Greg
Greg is one of our most regular bathroom bloggers here at Victorian Plumbing. He's always looking for the latest bathroom trends and styles and will be posting them here regularly. He'll also be posting practical 'How To' step-by-step DIY advice and reporting on his latest bathroom ideas at Victorian Plumbing.


