OUR WINTER SALE ENDS SOON!
*Boxing Day deals coming soon. Free delivery on orders over £499
How to Install a Toilet
How to Install a Toilet
In this simple bathroom DIY guide we'll show you how to install a toilet. We'll also cover removal of an old toilet for those who want to know how to replace an old toilet with a new loo.
Table of contents
- Preparation
- Removing a toilet
- Disposing of or recycling the old toilet
- Installing a toilet
- Installing a toilet cistern
- The cost to install a toilet
- How long it takes to install a toilet
Jump to any section of this post
Planning a Toilet Installation
You may need to plan a toilet installation for several reasons. One of the main reasons why you might want to fit a new toilet is to replace an old one; that either went out of style years ago or has developed a fault. Another reason could be that you’ve moved into a house which hasn’t already got a toilet in the bathroom and you’ll want to know how to install a toilet from scratch.
Whatever reason you have for installing a toilet, you'll be glad to know that most toilet installations are pretty similar. This ‘how to’ DIY guide is designed to help you fit your toilet from start to finish and has been written in a simple step-by-step format to make it as simple as possible.
In this how to install a toilet guide we will show you how to remove a toilet and how to dispose of your old toilet properly and safely. After the removal and disposal process we will guide you through the installation of your toilet and cistern. If you're fitting a toilet from scratch and not replacing an old one then you can jump straight to the 'How to install a toilet' section.
This how to guide covers all common toilet types, however there may be a small chance that your toilet requires special fitting instructions so please refer to your toilet’s manual or instructions in each case. And remember, this is just a guide so as always, we suggest you seek help from a professional installer especially if you are unsure or not very confident with DIY.
Right, let’s get our hands dirty (no, not literally)
Preparation
A good rule of thumb when you’re fitting a new toilet is to handle the toilet with care. Go easy with any use of a hammer, which should hardly be required anyway, and remember that you're dealing with porcelain. With that said, it’s also important to use a bit of force when necessary so don’t be afraid of being firm.
How a toilet works
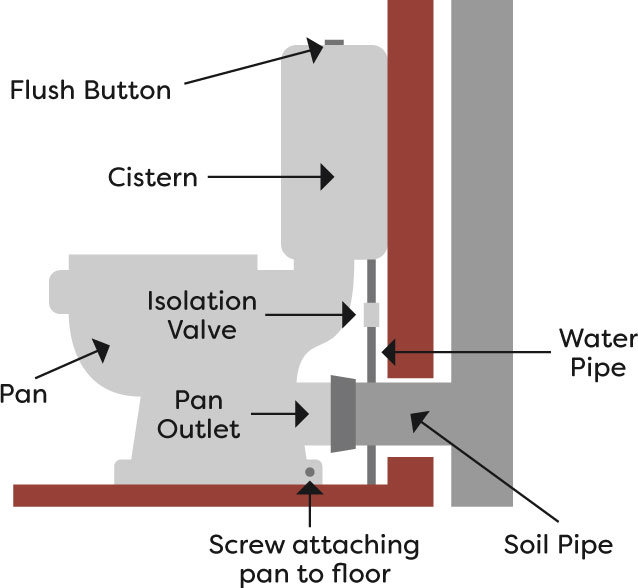
The image below shows a simple diagram of how a toilet is made up and all the important parts that we'll mention through this guide. It can be used to familiarise yourself with a typical toilet layout before you attempt the install. It will also come in handy should you need to refer back to it should become unsure at any stage of the install or removal. The style of the toilet in the diagram is a close coupled toilet and yours may not look the same.
What you will need to fit a toilet
Installing a toilet requires very little tools and with modern pans you’ll find that it’s easier than ever. We have listed below the tools you will need to install a toilet, as well as some extras that may come in handy.
- Wrenches
- Screwdriver
- Silicone
- Adjustable pliers
Simple toilet removals will generally be okay with the above tools. If you’re installing a toilet from scratch or fitting toilets that have cisterns (tanks) which aren’t connected directly to the pan; including wall hung toilets like those offered by Duravit usually chosen for their modern style and space-saving designs, or traditional high level toilets, you may require some additional plumbing tools for these types of toilets such as:
- Pipe Cutter or Hacksaw
- Pipe Wrench
- Box Spanner
- Hammer
- Spirit Level
- Drill
- Tape Measure
- Pencil
- Bucket
- Towel
Other items that you may require are:
Flexible Hose - The flexible hose connects to your cistern or tank and supplies it with cold water. You’ll need one if you’re installing a new toilet from scratch, but if you’re replacing an old toilet, you may consider replacing this also as you may not know when it was last replaced. For the sake of a few quid it pays to have a new flexi-hose in place.
If you want to know how to fit a toilet from scratch and there isn’t an old toilet which needs to be removed then go straight to the 'How to install a toilet' section below.

How to remove a toilet
Whether you’re removing a toilet to replace it with a new one or simply change your flooring, we’ll show you how to remove a toilet with as little fuss as possible. Removing an old toilet is easy with a bit of guidance, but there are a few things you need to remember.
*Tip. Always give the toilet a clean with antibacterial wipes/cleaner before touching it as it’ll make the job that little bit more pleasant. Feel free to wear safety gloves to keep hands clean and safe.
Step 1. Switch off the water
When you need to remove a toilet you’ll want to make sure there is no water in the cistern (tank) or pan(bowl). Simply switch off your water supply using the isolation valve on the water pipe and then flush the toilet until there’s no water left in the cistern. You’ll know if the water is switched off as the cistern won’t fill up upon flushing.
Most people will find a small amount of water that is left in the cistern. To get rid of this water, grab an old towel and push it down to the bottom of the cistern. Take a bucket and wring out the towel over the bucket and repeat these steps until there is no more water left lurking around. The pan may also have some water leftover so repeat the process there too!
Step 2. Disconnect the water pipe
Your cistern will have a pipe that feeds water to it for when it needs filling up. Use your wrench to undo this pipe and disconnect it from the cistern. A small amount of remaining water may spill out here so it may be a good idea to place a towel underneath the pipe to help catch any drips.
Step 3. Remove the fixing bolts
Your toilet should be fixed to the floor using several bolts. Carefully unscrew the nuts and washers to help free the toilet. Your toilet may also have silicone around the base to make it more secure. Simply remove this silicone to free your loo. The nuts may be covered by plastic caps. Use a screwdriver to pick these off to expose the bolts.
Step 4. Detach the toilet from soil pipe
The last thing to remove is the soil pipe (waste pipe) from the bottom or back of your loo. The back of the toilet has an outlet which connects to the soil pipe. Gently work the toilet loose from the pipe and your toilet should be removed successfully.
Step 5. Cover the soil pipe
Finally, cover the soil pipe and seal it using a bag or cloth, to prevent potentially harmful (and very smelly) gasses coming up into your bathroom from the sewers below. This is the least pleasant part of our 'how to remove a toilet' guide.
Now that you have removed the toilet you can see if there are any small bits that need replacing. Check the nuts and bolts over for any rusting or wear, and inspect the wax seal if your soil pipe is located under the toilet. Replace the bolts if necessary when installing a new toilet and we always recommend fitting a new wax ring if your toilet has one.
Removing a wax ring is simple. Take a scraper tool and scrape of the wax from around the soil pipe.

If you want to install a toilet or fit some bathroom tiles after this removal then clear the area and tidy it up for an easier and more straightforward installation. If you do install tiles, make sure you allow them to set fully before installing the toilet.
Disposing of or recycling the old toilet
When you’ve removed your toilet and you need to get rid of it, it can be taken to a local household waste recycling centre (HWRC). Most of us know this as the tip. Before you move it from the bathroom, ensure it’s clean and dry enough to take through your house and put in your car. When you get to the tip - check with an assistant there who can advise you of the best methods of disposal.
If you plan on going to the tip to recycle or dispose of your loo then we always advise getting in touch with them first to make sure they will accept it; especially if you have to travel quite far.
How to install a toilet
Installing a toilet sounds a lot more difficult than it really is. You need to make sure the connections are all secure during the toilet installation, for obvious reasons, but as long as you get this right there’s not a great deal to it.
This how to install a toilet guide attempts to cover all toilet pan styles although we always recommend that you check with your toilet manufacturer’s instructions before you begin using our guide. This section of the ‘how to’ is purely designed to help you fit a toilet pan to an existing location and if you’re unsure of anything please consult a plumber or an expert to help you.
Step 1. Measure up and add the wax ring
Whether you’re fitting your old toilet back again after removing it or installing a brand new toilet from scratch, you’ll need to measure and mark for the drill holes to secure your loo. If your toilet has an outlet underneath (rather than at the back of your toilet) remove the soil cover and add the new wax ring.
Step 2. Remove the soil pipe cover and connect the toilet
Whether you’re fitting your old toilet back again after removing it or installing a brand new toilet from scratch, you’ll need to measure and mark for the drill holes to secure your loo. If your toilet has an outlet underneath (rather than at the back of your toilet) remove the soil cover and add the new wax ring.
Step 3. Securing the toilet to the floor
Once the toilet is connected to the soil pipe it’s time to secure it to the floor by screwing in the bolts. Screw each bolt in half way to begin with and then carefully tighten each one up. It’s important not to over-tighten these bolts as it can crack the toilet pan so be gentle here.
Some toilets have 2 or 4 screws that go into the floor although some toilets have l shape brackets which are fixed to the floor and are hidden inside the toilet base. Screws are then fixed into these brackets from the outside. Follow the instructions for your specific toilet for further help securing your toilet to the floor.
To fit a toilet with L shaped clamps, simply:
• Fit the toilet to the soil pipe and push it back to the wall into place
• Grab a pencil and mark on the floor where the holes are
• Disconnect the toilet again and place it upside down
• Loosely fit the screws through the toilet and into the L shape brackets and measure with a tape measure the distance between the two holes. Divide this number by 2
• Measure between the two original markings on the floor and divide this number by 2 then mark the centre of the two floor markings.
• Take your original measurement from between the two L brackets and mark outwards from the centre marking towards both original floor markings.
• Mark down these positions on the floor as this is where you will fix your L shape brackets.
• Screw in your brackets securely to the floor using your new markings.
*Note - We will want to create a seal around the base of the toilet pan with silicone, but before we do this we’ll install the cistern and only seal the toilet to the floor once everything has been checked.
Step 4. Installing the cistern tank
This guide attempts to cover every toilet cistern, but we can’t guide you through the installation of a concealed cistern as this will involve additional work; here we would certainly recommend you use a professional.
Below is a list of cistern types that you may need to install:
• Close Coupled Toilet Cistern - This cistern is connected very close to the pan. That’s where this toilet gets its name.
• Low Level Toilet Cistern - A traditional style cistern for traditional toilets; low level cisterns are fixed just above the pan and usually have a gap between them and the pan.
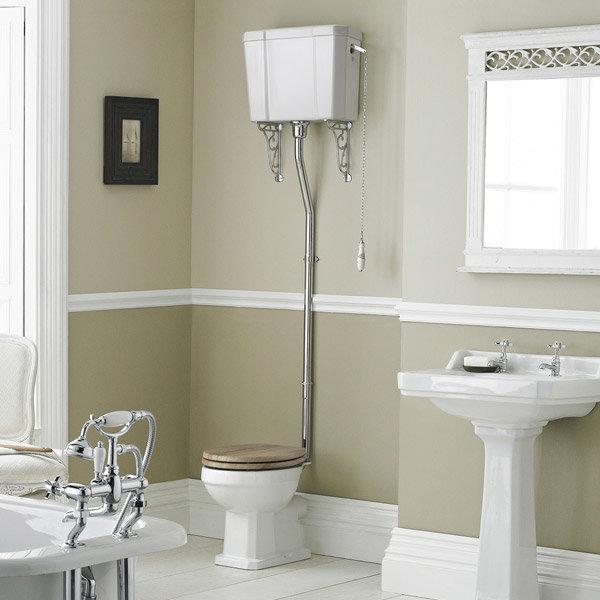
• High Level Toilet Cistern - Another traditionally styled cistern for a traditional toilet; high level cisterns are fixed high up on the wall above the pan and require a step or step ladder to gain access.
When you unpack your cistern you will find all the connections, screws, bolts and bits required for installation, including a seal. Most cisterns have a way of being fixed to the wall so check your cistern and grab a tape measure.
Installing a close coupled cistern
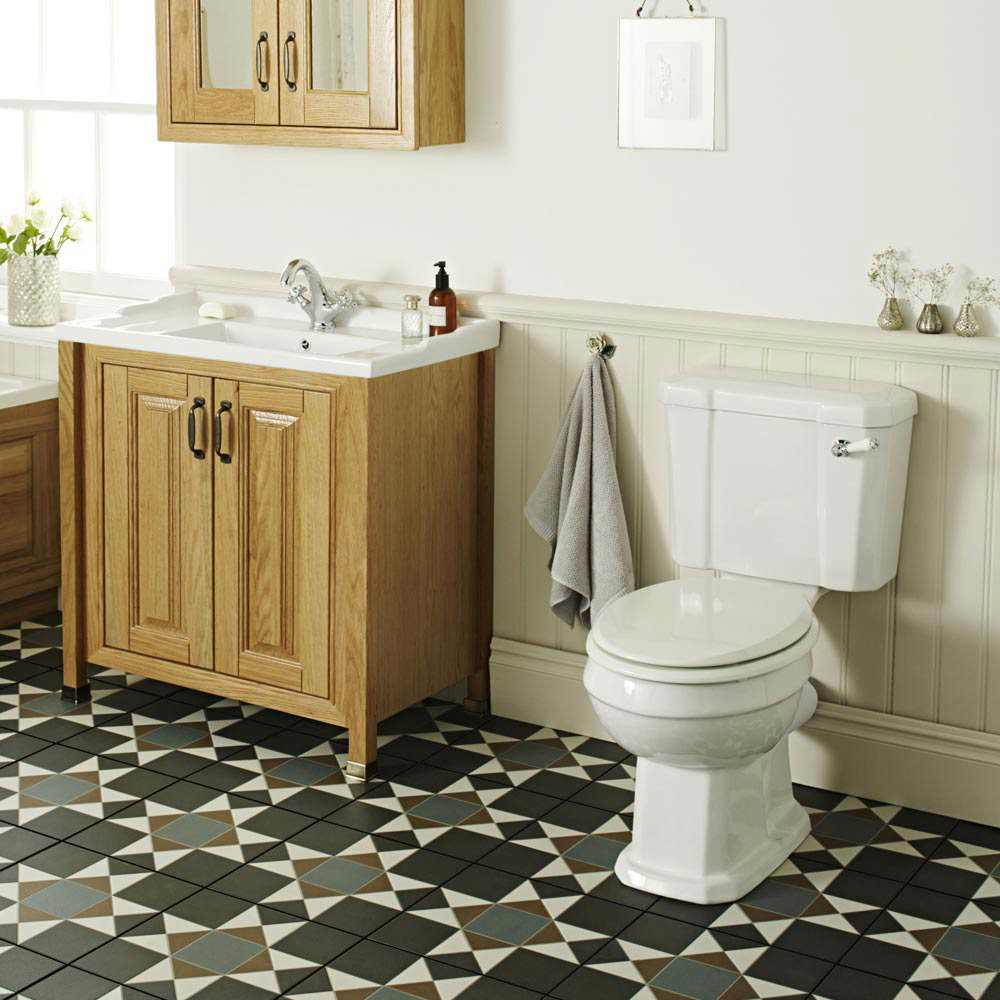
One of the easiest and most common cisterns to install is a close coupled cistern. This cistern sits on top of your close coupled toilet pan and is typically secured by two bolts with square ends. Slot them into fixings either side of the seal on the underside of your cistern or where your instructions suggest. The top of your toilet pan will have a hole (usually in the centre) where the water will pass from the cistern into the pan when you flush it. Place your seal on top of this hole. Now take your cistern and carefully position it over the pan and ensure all the screws line up. Now take your nuts/wingnuts and tighten the screws which hold the cistern to the pan; this can be a fiddly process so try to have some patience! The cistern will need fixing to the wall; although this is purely for keeping the cistern in place and won’t require to much work.
Installing low level or high level cisterns
With low level or high level toilets the process is slightly different and may require some professional help. Follow your product’s instructions at all times as these cisterns do differ from one to another. Measure up your cistern against the walls and mark out your drill holes. Ensure the piping lines up with your toilet and use a spirit level to ensure the cistern isn’t wonky. Your water supply pipe will typically be above the cistern itself so if you’re installing your toilet from scratch then we recommend getting a professional to help here.
Step 5. Connect the water pipe to the cistern
Connect the water pipe to the cistern and using a wrench, tighten up until it’s nice and secure. If your cistern is connected to the toilet; a close coupled toilet for example, then you’ll need to connect it to the toilet using the nuts and washers provided. Adding a small amount of sealant where the bolt sits against the cistern will add an extra level of waterproofing.
Step 6. Turn on the water and check for leaks
When everything is fixed in place and secure, switch the water back on and then wait for the cistern to fill. Ensure there are no leaks from the cistern and then flush the toilet. Check around the seals for any leakage and have some old towels handy should there be any problems.
That’s it, your toilet installation is complete!
How much does it cost to install a toilet?
The cost of a toilet installation done by a professional varies on the type of toilet you want installing. You can typically expect to pay between £80 and £160. Some toilets may require additional work which can add on to the final price.
How long does it take to install a toilet?
If you’re wondering how long it takes to install a toilet then the answer does depend on several factors. Installing a toilet takes between 1 hour and 4 hours depending on the level of experience and type of toilet you’re planning to install.
Once your toilet installation is complete, you’ll want to fit a toilet seat. If you’re unsure how to do this then check out our guide to fitting a toilet seat which will help you.
With a recent rise in popularity of toilets and bidets, you may want to fit a bidet at the same time. We have previously written a guide on how to install a bidet which you will find helpful.

Sarah
Sarah is one of our resident bathroom experts here at Victorian Plumbing. She loves writing helpful bathroom design and DIY articles, as well as detailed buying guides.
