EASTER OFFER: FREE DELIVERY ON ORDERS OVER £99!**
Delivery Offer Must End Soon!
how to install bathroom underfloor heating
How to Install Bathroom Underfloor Heating
Read our expert step-by-step guide on how to install bathroom underfloor heating; the perfect installation for frosty, unwelcoming mornings!
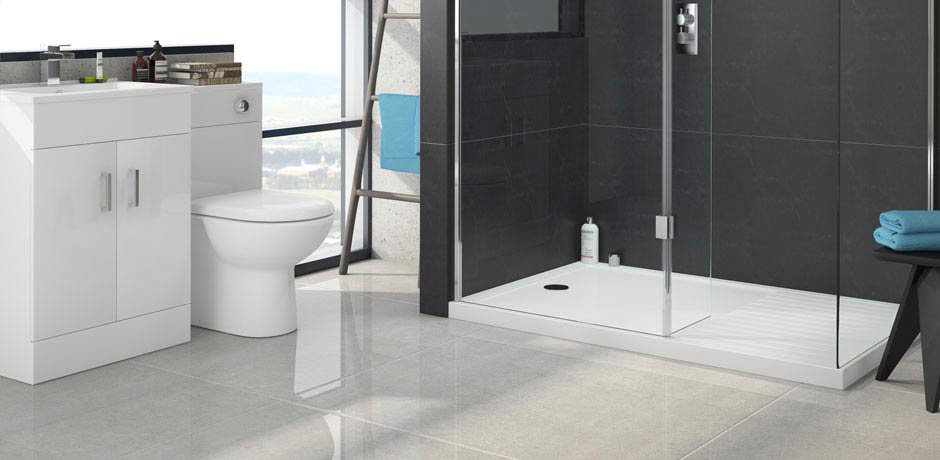
The thought of leaving your toasty warm bed on a frosty morning is made so much easier with the knowledge that your bathroom floor is at the perfect temperature thanks to underfloor heating. It's a great feeling and these days, more and more people are saving money by installing this underfloor technology themselves.
The Advantages of Underfloor Heating?
Choosing underfloor bathroom heating as a way of heating your bathroom is a clever choice. You will see a reduction in the amount of energy you use to heat your bathroom and once it's down there little to no maintenance is required. Another standout feature of underfloor heating is that it will open up the space in your bathroom because now there is no need to install a radiator on the wall. This is fantastic for small bathrooms where space can be at a premium.
Reduced energy costs
Installing underfloor heating can really help to bring down energy costs in your home. This is because underfloor heating uses 15% to 40% less energy than standard radiators, which means you and your wallet will soon be feeling the benefit of an underfloor heating system.
More available space in your bathroom
By installing underfloor heating, you will be saving space in your bathroom by eliminating the need for a radiator. This will make your bathroom look and feel much more spacious and open.
Even heat distribution
Unlike a radiator which will heat the room one area at a time, underfloor heating provides even heat distribution, which means the room will gradually heat up as a whole.
Minimal maintenance required
Another advantage of having an underfloor heating system is that they require minimal maintenance. Which means you can almost set it and forget it!
Easy to install
Although the installation process can be time consuming, it is very easy to carry out. Which means almost anyone can install underfloor heating themselves, if they feel comfortable enough to do so.
Luxury feature that increases the value of your home
Underfloor heating is a great way to make your home feel more luxurious and spa-like. By installing underfloor heating in your home, you will not only feel the benefits on a day to day basis, this heating solution will also add value to your home.
Electric Underfloor Heating Installation
Underfloor heating is always best installed by professionals, but it is not impossible to do it yourself if you feel comfortable enough to do so. Despite being a long process, installing underfloor heating is a straightforward and simple process that any capable person can undertake themselves.
Installing underfloor heating is an intermediate DIY job which means that you’ll need experience of doing other DIY jobs around your home and you have a healthy confidence in your own ability. As always with our DIY guides it is important to take your time, plan carefully and have a keen determination to learn new skills.
*Please note - If at any point during the installation you feel you have bitten off more than you can chew or are unsure of anything at all then we recommend that you call in a professional. Please also note that connecting your underfloor heating to the mains electrical supply for your home should always be done by a part P qualified electrician.
What You Will Need?
- Underfloor heating
- Underfloor heating thermostat
- Insulation / thermal boards (optional)
- Waterproof tape (optional)
- Utility knife (optional)
- Multi-meter
- Duct tape
- Scissors
- Tape measure
- Chisel (optional)
- Hammer (optional)
Ready? Let's go!
Step 1. Measure & Order
The first thing to do before even ordering your underfloor heating is to measure the footprint of your bathroom floor accurately. There is no need to include underfloor heating under any of the permanent fixtures in your bathroom like a vanity unit, toilet or bath. Also, bear in mind that you want to leave a gap of approximately 150 mm (6 inches) between your underfloor heating and any walls or permanent fixtures. Expert tip: order a little more underfloor heating than you think you might need to cover any awkward spaces in your bathroom (see awkward areas below).
Step 2. Read Up!
Once you have made your order and it has arrived at your home then the first thing to do is to read the instructions that come with your underfloor heating. Believe me when I tell you that 30 minutes spent getting to grips with the instructions now will save you hours later on when you get down to laying and installing your new system. Also, please note that this guide is not a substitute for the instructions you receive with your underfloor heating.
Step 3. Clean Up!
The next thing that's really important is that your bathroom floor is as clean as possible. Getting your hoover around an installed underfloor heating set up is a real nightmare so get this job boxed off now to save the heartache later on.
Step 4. Resistance Reading
Finally, after unpacking your underfloor heating and making sure all parts are present and accounted for you will now want to take an accurate resistance reading from the end wires that come off the underfloor heating mesh mat. You take this resistance reading to make sure that your underfloor heating is functioning as it should and also to make sure that no damage has occurred during delivery to your home.
A resistance reading is taken using a multimeter and the figures you want to be getting from your system will be stated in your instruction manual. Record the figures you take from the multimeter in your instruction manual because you will continue to take resistance readings throughout the installation process and it really helps to have your figures to hand at any time.
If you have never used a multimeter before then don't fret, it's really straightforward and not at all dangerous. For more information find out about how to use a multimeter.
Step 5. Laying the Sub-Floor Insulation / Thermal Boards (Optional)
Sub-floor insulation boards (sometimes referred to as thermal boards or even backing boards) are sheets of insulated board that are fitted underneath your underfloor heating. This is an optional step. Insulation boards are put in place to prevent the escape of heat from your underfloor heating going down into your floor boards rather than up and into your bathroom.
Whether you choose to install insulation boards is completely up to you. Manufacturers state that including these boards under your underfloor heating will increase its effectiveness and in turn save you money. Another factor to consider is that installing this feature will increase the overall height of your bathroom floor slightly.
Fitting these boards is simple. Lay the boards down over the complete surface area of your bathroom floor and in the awkward areas you can cut individual boards down with utility knife to get the shapes you need. Connect the individual boards together with waterproof tape along the join between the boards. If laying insulation boards on wooden floor boards you can take the extra step to screwing them down.
Step 6. Laying the Underfloor Heating
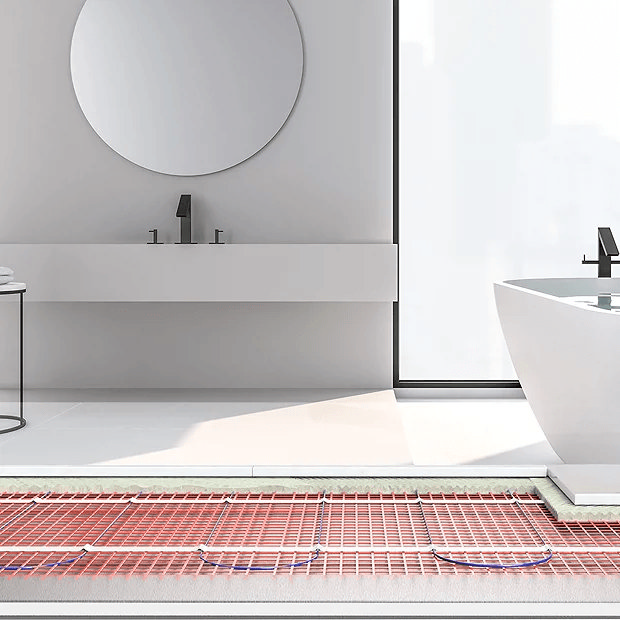
Your underfloor heating system is essentially an electrical wire attached to a rolled up mesh sheet. Laying your underfloor heating is quite literally as simple as unrolling this mesh sheet to cover the entire surface area of your bathroom. Remember that you don't need to cover areas under permanent fixtures like baths and toilets and to leave a gap of approximately 150 mm (6 inches) between the edge of your underfloor heating and your bathroom wall.
When beginning to lay your underfloor heating mesh, lookout for the two wires that come off the start of the mesh sheet. These two wires will eventually be ran up to attach to your thermostat so remember to position these wires close to where you want your thermostat to be positioned.
Fix your underfloor heating mesh to the ground using duct tape. Do your best to make sure there are no edges of the mesh sheets sticking up because you run the risk of catching them with your trowel when preparing the grout for tiling later.
When you have finished laying your underfloor heating mesh it is time to take another resistance reading with your multimeter to make sure you haven't damaged your system during this process. If your multi-meter reading if different from the values you see in your instruction manual then contact the manufacturer; contact details will be in your manual.
Step 7. Turning Corners
The great thing about using mesh sheets when laying underfloor heating is that you can easily turn corners with it. The mesh sheets can easily be cut and then turned either at 90 degrees (to go in another direction) or even 180 degrees (to go back on yourself) angles. Remember: never cut the electrical wire, just the mesh it sits on! This way the mesh sheets can be positioned to cover the whole of your bathroom floor and the electrical wire can flow UNBROKEN all the way around.
Step 8. Awkward Areas
The best way to deal with awkward areas is the remove the electrical wire from the mesh sheet completely. Carefully use your scissors to cut the wire free and then position the wire by hand in the awkward to reach areas of your bathroom like alcoves and curved edges. Fasten loose wires to your floor with duct tape and make sure the wires are always at least 50 mm (2 inches) apart when loose.
Expert tip: If you are left with excess mesh sheets when your whole bathroom floor is covered then remove the electrical wire from the mesh sheets and carefully lay it down around the edge of your bathroom in the 150 mm (6 inches) gap between your bathroom wall and the start of your underfloor heating. At no point attempt to cut the electrical wire in order to make it shorter!
Step 9. Installing the Sensor / Probe
The underfloor heating sensor (or probe as it's sometimes called) checks the temperature of your floor. The correct installation of the sensor ensures that your thermostat has an accurate temperature reading which in turn makes your system more efficient.
The sensor is placed between any two lines of electrical wire (within the underfloor heating mesh) close to the edge of your room where you are planning to install the thermostat. Fasten the sensor down with duct tape.
Another option that may make the censor a little more secure is to chisel out a pen sized section of either your floor boards or insulation boards (if used) and then place your sensor within this recess.
When you have finished installing the sensor you now want to take another resistance reading with your multimeter and then record your figures in the instruction manual.
Step 7. Connecting the Thermostat
Each thermostat for each underfloor heating system is slightly different so my best advice here is to follow the user manual as carefully as possible. Connecting the thermostat is essentially connecting the wires that come from the electrical mesh sheet (sometimes referred to as the 'cold tale') to the thermostat, connecting the sensor to the thermostat and then mounting the thermostat to the wall.
The thermostat must then be connected to the power supply in your house. Always remember that the connection from your thermostat to the electrical mains in your house MUST be completed by a part P registered electrician.
Make sure you take another resistance reading with your multimeter at this point too.
Step 8. Continuing to Add Your Bathroom Floor on Top
Now your underfloor heating is in place, the final job on the list is to fit your bathroom floor on top. An electrical underfloor system can be used with either bathroom tiles, laminate or real wood flooring. Expert tip: if you have plans to tile your floor then you can place your tile grout right on top of your underfloor mesh sheets, this process actually helps to secure and insulate your wiring. Remember to allow all tile grout to firmly set before turning on your system for the first time.
If you follow these steps above then you should have every confidence that you will be able to install your underfloor heating yourself. Underfloor heating is such a nice addition to your home and I really hope you and your family enjoy the sensation of warm feet.
Interested in smart heating too? Read this guide to smart heating systems.
Edward, Victorian Plumbing

