UP TO 60% OFF SPRING SALE!
Free Delivery on Orders Over £499**
how to install shower wall panels
How to Install Shower Wall Panels
Check out our step-by-step guide on how to install shower wall panels. Find an easy to follow breakdown of the entire process all in 7 simple steps.
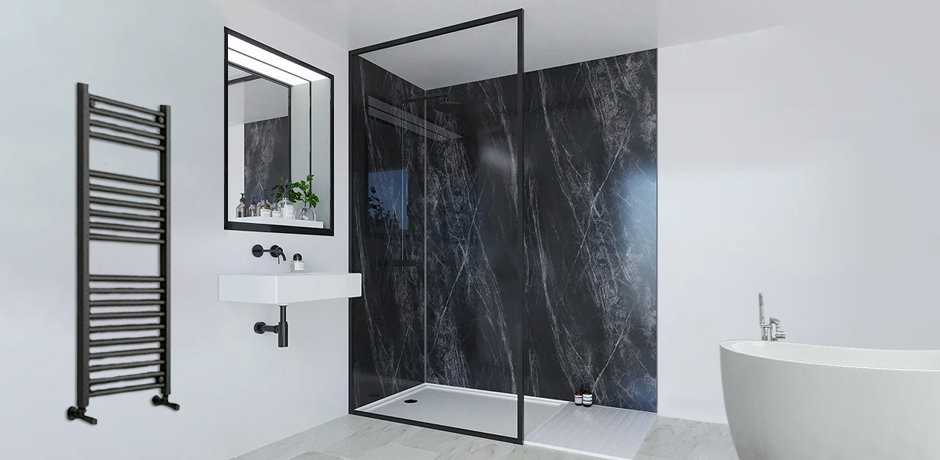
Shower wall panels are becoming a go-to choice for bathroom renovations. They’re quick to install, fully waterproof, and completely grout-free, meaning no more scrubbing between tiles. Whether you’re a DIY enthusiast or just looking to save on renovation costs, this guide will walk you through the step-by-step installation process so you can achieve a sleek, professional-looking finish.
Watch the video below for a full walkthrough.
Watch: How to Install Shower Wall Panels
How to Install Shower Wall Panels – Step-by-Step Guide
Step 1: Measure Your Walls
Before starting, measure the area where the shower wall panels will be installed—both horizontally and vertically. Wall panels can be fitted over various surfaces, including tiles and plasterboard.
Step 2: Cutting Your Panels to Size
Lay your panel flat on a supported surface, front side facing up. Mark out your cutting lines using a pencil and apply masking tape along the edges—this prevents chipping when cutting.
For the cleanest cut, use an electric saw (wear safety goggles). If using trims for a polished edge, remove the tongue and groove joint from the sides that will sit against a trim.
Some trims may need to be screwed in, so check the instructions provided with your panels.
Step 3: Sand the Edges and Back of the Panel
Once cut, take a sanding pad and smooth out the edges—this removes debris and ensures a clean finish.
Next, flip the panel over and lightly sand the back. This roughens the surface slightly, helping the adhesive form a stronger bond with the wall.
Step 4: Prepare the Wall and Trims
If using corner trims, apply a small bead of sealant along the wall before positioning the trim into place.
Before attaching the first panel, place tile spacers along the bottom—this creates space for sealant later, ensuring a waterproof seal along the base of the panels.
Step 5: Apply Adhesive & Fix the Panels
For secure bonding, use a combination of foam tape and sealant:
- Apply three vertical strips of foam tape down the back of the panel.
- Add sealant: a thin line down either side, a zigzag pattern across the top and bottom, and large circular dabs to ensure even distribution.
Now, attach an end trim to the edge of the panel by applying a thin bead of sealant inside the trim. This ensures a tight fit against the wall.
Before fixing the panel to the wall:
- Apply sealant along the corner trim (if using one).
- Peel off the foam tape backing last—this prevents sticking before the panel is correctly positioned.
Lift the panel into place, angling it slightly as you slide it into the corner trim. Once in position, press it firmly against the wall.
Step 6: Repeat for Remaining Wall Panels
Continue fitting the rest of the panels, ensuring any tongue and groove joints lock neatly into place. If you want a less visible joint, apply masking tape before sealing the groove—then remove it for a crisp finish.
For an ultra-neat look, use a silicone finishing tool to smooth out sealant lines.
Step 7: Final Sealing
To ensure a fully waterproof finish:
- Apply sealant to the floor joint where the panels meet the base.
- Use a silicone finishing tool to smooth the sealant.
Once the sealant has dried, remove the tile spacers and enjoy your new, modern shower walls.
Why Choose Shower Wall Panels?
Shower wall panels are an effective and stylish alternative to tiles. Here’s why they’re becoming a must-have in bathroom renovations:
- Faster and easier to install than tiles, with no messy grout.
- Fully waterproof when sealed correctly.
- Low maintenance—without grout, there’s no mould or limescale build-up.
- Available in a range of styles, including tile-effect designs.
The Benefits of Shower Wall Panels
While tiles are a classic choice, they can be expensive and time-consuming to install. Shower wall panels offer a cost-effective solution, especially if you’re covering multiple walls.
Another major advantage is that they don’t require grout. Grout is notorious for staining due to limescale, dirt, and mould build-up. By eliminating grout altogether, your shower space stays looking fresh for longer with far less maintenance.
What Types of Shower Panels Can I Use?
There are three main types of shower wall panels, each with unique benefits:
- PVC Panels – Lightweight, fully waterproof, and slightly flexible (ideal for imperfect walls).
- Acrylic Panels – Slimmer, high-gloss, and completely waterproof.
- MDF Panels (Laminated) – Waterproof, cost-effective, and easy to install.
Not sure which one’s best for you? Check out our Shower Wall Panel Buying Guide for more details.
Pass It On – Your DIY Crew Will Thank You
Thinking of tackling more DIY projects? Here’s what to do next:
- Share this guide with friends and family planning a bathroom renovation.
- Explore our other DIY guides for expert tips and step-by-step tutorials.
- Check out our bathroom buying guides to find the perfect fixtures and fittings for your space.

