UP TO 60% OFF SPRING SALE!
Free Delivery on Orders Over £499**
Bath Screen Buying Guides
Bath Screen Buying Guides
How To Choose The Right Bath Screen For You
- Shower Trays
- - Rectangular Shower Trays
- - Quadrant Shower Trays
- - Square Shower Trays
- - Offset Quadrant Shower Trays
- - Pentagonal Shower Trays
- - Slate Effect Shower Trays
- - Walk In Shower Trays
- Shower Cabins
- Quadrant Shower Enclosures
- Square Shower Enclosures
- Rectangular Shower Enclosures
- Frameless Shower Enclosures
- Offset Quadrant Shower Enclosures
- Shower Side Panels
- Shower Doors
If you want to add a shower above your bath, giving you the benefit of both options without taking up too much space, then you're going to need to install a bath screen. Available in a large array of shapes and sizes, these items will prevent your floor from getting soaked when you take a shower as they prevent splashing. This guide will look at your choices and how different designs may benefit you.
What are my options?
Depending on what you're after, you'll find several types of bath screen, each with its own advantages, including:
Square bath screens
These are your standard screens which are really popular with bath/shower combinations. They feature a fixed design and come in plenty of size options so you can easily find something which is suitable for your bathroom.
Curved bath screens
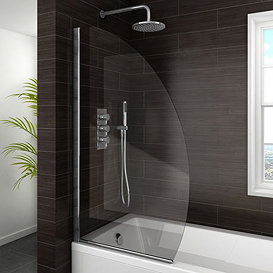
These screens can either feature a curved edge at the top, or the whole glass screen itself can be curved in order to fit a p-shaped bath. An ideal upgrade for contemporary settings.
Sail bath screens
These items feature a unique shape which is perfectly suited to more modern environments. Many come with rails or side panels as well for an extra touch of practicality.
Folding bath screens
A great option if you need to keep space at a maximum. They are available in 4 or 5 panel variants and their folding mechanism will allow you to easily adjust them, making for a stylish, functional upgrade that will make your daily routine much more practical.
Sliding bath screens
The basic idea with these screens is the same as folding ones; they are designed in order to maximise the available space. They are ideal for modern spaces and will give off a genuine bespoke feel. A special mechanism keeps the screen firmly in position so it won't rattle around at all or slide back while you're using it.
Are they easy to install?
Fitting a bath screen yourself isn't massively difficult, although we would definitely recommend contacting a professional to do the work if you're a little unsure. If you're confident in tackling this job, here's what you need to do:
The first task is to make sure that the wall you will be drilling into does not have any pipes in the way as this can obviously lead to some pretty serious damage. You can easily check this by using a multi-purpose detector.
Next, you need to offer up the u-channel (the metal part of the screen that comes into contact with the wall) to the wall, keeping it in line with the bath. You need to mark the position of the screw holes on the wall, making sure that the screen is perfectly straight and level first. Also, be sure to leave a 40mm gap from the edge of the bath.
Drill the holes you've marked out and insert some rawl plugs into them. A strip of sealant should then be added to the back of the u-channel before holding it firmly in position against the wall. Insert the screws into the holes and make sure they are tight and the screen cannot move about. The bottom of the u-channel then needs to be sealed to the bath for extra security.
The rubber seal should then be attached to the bottom of the screen, which can then be inserted into the opening of the u-channel. Screw the screen in place, making sure it is fully secured and isn't loose. The screen should sit flush to the bath. All you have to do then is give the sealant some time to dry and you're good to go!
Top tip
If you're worried about the drill chipping or damaging your tiles, simply place some masking tape over the marks before drilling into them as this should keep the drill steady.


